与 Angular 集成
在阅读本指南之前,建议您具备 Angular 的基本知识。如果需要复习,请参考 Angular documentation。
DHTMLX Kanban 可以与 Angular 平滑集成。我们提供了代码示例,演示如何将 DHTMLX Kanban 与 Angular 搭配使用。详细信息可参见 GitHub 示例。
创建项目
在开始新项目之前,请确保已安装 Angular CLI 和 Node.js。
要使用 Angular CLI 创建名为 my-angular-kanban-app 的新项目,只需运行:
ng new my-angular-kanban-app
如果您正在按照本指南操作,在创建 Angular 应用时请关闭服务端渲染 (SSR) 和静态站点生成 (SSG/Prerendering)!
此命令会完成所有必要的设置,无需额外命令。
安装依赖
进入新应用的目录:
cd my-angular-kanban-app
接下来,安装依赖并启动开发服务器。可以使用 yarn 进行如下操作:
yarn
yarn start
您的应用此时应该在本地运行(例如,http://localhost:3000)。
创建 Kanban
此时,您需要获取 DHTMLX Kanban 的源代码。首先,停止应用并安装 Kanban 包。
步骤 1. 安装包
获取 试用 Kanban 包,并按照 README �中的步骤操作。请注意,试用版有效期为 30 天。
步骤 2. 创建组件
接下来,创建一个 Angular 组件,将 Kanban 及工具栏添加到您的应用。在 src/app/ 下新建 kanban 文件夹,然后添加名为 kanban.component.ts 的新文件。
导入源文件
打开 kanban.component.ts,导入 Kanban 的源文件。导入路径如下:
- 如果是从本地文件夹安装的 PRO 版本:
import { Kanban, Toolbar } from 'dhx-kanban-package';
- 试用版:
import { Kanban, Toolbar } from '@dhx/trial-kanban';
本文档示例采用 trial 版本。
设置容器并初始化 Kanban 和 Toolbar
要显示带有工具栏的 Kanban,需要为两者设置容器,并通过构造函数初始化组件:
import { Kanban, Toolbar } from '@dhx/trial-kanban';
import { Component, ElementRef, OnInit, ViewChild, OnDestroy, ViewEncapsulation} from '@angular/core';

@Component({
    encapsulation: ViewEncapsulation.None,
    selector: "kanban", // 在 "app.component.ts" 文件中以 <kanban /> 形式引用的模板名
    styleUrls: ["./kanban.component.css"], // 包含 CSS 文件
    template:  `<div class = "component_container">
                    <div #toolbar_container></div>
                    <div #kanban_container class = "widget"></div>
                </div>`
})

export class KanbanComponent implements OnInit, OnDestroy {
    // 初始化 Toolbar 容器
    @ViewChild("toolbar_container", { static: true }) toolbar_container!: ElementRef;
    // 初始化 Kanban 容器
    @ViewChild("kanban_container", { static: true }) kanban_container!: ElementRef;

    private _kanban!: Kanban;
    private _toolbar!: Toolbar;

    ngOnInit() {
        // 初始化 Kanban 组件
        this._kanban = new Kanban(this.kanban_container.nativeElement, {});

        // 初始化 Toolbar 组件
        this._toolbar = new Toolbar(this.toolbar_container.nativeElement, {
            api: this._kanban.api,
            // 其他配置项
        });
    }

    ngOnDestroy(): void {
        this._kanban.destructor(); // 销毁 Kanban
        this._toolbar.destructor(); // 销毁 Toolbar
    }
}
添加样式
为确保 Kanban 正确显示,请添加必要的样式。可在 src/app/kanban/ 下新建 kanban.component.css 文件,并包含如下样式:
/* 导入 Kanban 样式 */
@import "@dhx/trial-kanban/dist/kanban.css";

/* 页面初始样式 */
html,
body{
    height: 100%;
    padding: 0;
    margin: 0;
}

/* Kanban 和 Toolbar 容器样式 */
.component_container {
    height: 100%;
    margin: 0 auto;
}

/* Kanban 容器样式 */
.widget {
    height: calc(100% - 56px);
}
加载数据
要向 Kanban 加载数据,请先准备一组数据。在 src/app/kanban/ 下新建 data.ts 文件,并添加您的数据:
export function getData() {
    const columns = [
        {
            label: "Backlog",
            id: "backlog"
        },
        {
            label: "In progress",
            id: "inprogress"
        },
        // ...
    ];

    const cards = [
        {
            id: 1,
            label: "Integration with Angular/React",
            priority: 1,
            color: "#65D3B3",
            start_date: new Date("01/07/2021"),
            users: [3, 2],
            column: "backlog",
            type: "feature",
        },
        {
            label: "Archive the cards/boards ",
            priority: 3,
            color: "#58C3FE",
            users: [4],
            progress: 1,
            column: "backlog",
            type: "feature",
        },
        // ...
    ];

    const rows = [
        {
            label: "Feature",
            id: "feature",
        },
        {
            label: "Task",
            id: "task",
        }
    ];

    return { columns, cards, rows };
}
接下来,打开 kanban.component.ts。导入数据文件,并在 ngOnInit() 方法中将数据属性传入 Kanban 的配置:
import { Kanban, Toolbar } from '@dhx/trial-kanban';
import { getData } from "./data"; // 导入数据
import { Component, ElementRef, OnInit, ViewChild, OnDestroy, ViewEncapsulation} from '@angular/core';

@Component({
    encapsulation: ViewEncapsulation.None,
    selector: "kanban",
    styleUrls: ["./kanban.component.css"],
    template:  `<div class = "component_container">
                    <div #toolbar_container></div>
                    <div #kanban_container class = "widget"></div>
                </div>`
})

export class KanbanComponent implements OnInit, OnDestroy {
    @ViewChild("toolbar_container", { static: true }) toolbar_container!: ElementRef;
    @ViewChild("kanban_container", { static: true }) kanban_container!: ElementRef;

    private _kanban!: Kanban;
    private _toolbar!: Toolbar;

    ngOnInit() {
        const { cards, columns, rows } = getData(); // 初始化数据属性
        this._kanban = new Kanban(this.kanban_container.nativeElement, {
            columns, // 赋值列数据
            cards, // 赋值卡片数据
            rows, // 赋值行数据
            rowKey: "type",
            // 其他配置项
        });

        this._toolbar = new Toolbar(this.toolbar_container.nativeElement, {
            api: this._kanban.api,
            // 其他配置项
        });
    }

    ngOnDestroy(): void {
        this._kanban.destructor();
        this._toolbar.destructor();
    }
}
另一种加载数据到 Kanban 的方法是,在 ngOnInit() 方法中使用 parse() 方法。
import { Kanban, Toolbar } from '@dhx/trial-kanban';
import { getData } from "./data"; // 导入数据
import { Component, ElementRef, OnInit, ViewChild, OnDestroy, ViewEncapsulation} from '@angular/core';

@Component({
    encapsulation: ViewEncapsulation.None,
    selector: "kanban",
    styleUrls: ["./kanban.component.css"],
    template:  `<div class = "component_container">
                    <div #toolbar_container></div>
                    <div #kanban_container class = "widget"></div>
                </div>`
})

export class KanbanComponent implements OnInit, OnDestroy {
    @ViewChild("toolbar_container", { static: true }) toolbar_container!: ElementRef;
    @ViewChild("kanban_container", { static: true }) kanban_container!: ElementRef;

    private _kanban!: Kanban;
    private _toolbar!: Toolbar;

    ngOnInit() {
        const { cards, columns, rows } = getData(); // 初始化数据属性
        this._kanban = new Kanban(this.kanban_container.nativeElement, {
            columns: [],
            cards: [],
            rows: [],
            rowKey: "type",
            // 其他配置项
        });

        this._toolbar = new Toolbar(this.toolbar_container.nativeElement, {
            api: this._kanban.api,
            // 其他配置项
        });

        // 通过 parse() 方法设置数据
        this._kanban.parse({
            columns,
            cards,
            rows
        });
    }

    ngOnDestroy(): void {
        this._kanban.destructor();
        this._toolbar.destructor();
    }
}
使用 parse(data) 方法可以随时重新加载数据。
这样,Kanban 组件就配置完成了。将该元素添加到页面后,Kanban 会以数据集初始化。您也可以根据需要调整任何配置项。所有可用属性请参考 Kanban API 文档。
事件处理
每当有人与 Kanban 交互时,都会触发一个事件。您可以利用这些事件跟踪操作并执行自定义代码。查看 完整事件列表 获取详细信息。
打开 kanban.component.ts,将 ngOnInit() 方法修改如下:
// ...
ngOnInit() {
    this._kanban = new Kanban(this.kanban_container.nativeElement, {});

    this._kanban.api.on("add-card", (obj) => {
        console.log(obj.columnId);
    });
}

ngOnDestroy(): void {
    this._kanban.destructor();
}
步骤 3. 将 Kanban 添加到应用
要在您的应用中使用 KanbanComponent,请打开 src/app/app.component.ts,并将默认代码替换为:
import { Component } from "@angular/core";

@Component({
    selector: "app-root",
    template: `<kanban/>`
})
export class AppComponent {
    name = "";
}
然后,在 src/app/ 下创建 app.module.ts,并声明 KanbanComponent:
import { NgModule } from "@angular/core";
import { BrowserModule } from "@angular/platform-browser";

import { AppComponent } from "./app.component";
import { KanbanComponent } from "./kanban/kanban.component";

@NgModule({
    declarations: [AppComponent, KanbanComponent],
    imports: [BrowserModule],
    bootstrap: [AppComponent]
})
export class AppModule {}
最后,打开 src/main.ts,使用如下代码:
import { platformBrowserDynamic } from "@angular/platform-browser-dynamic";
import { AppModule } from "./app/app.module";
platformBrowserDynamic()
    .bootstrapModule(AppModule)
    .catch((err) => console.error(err));
此时,您可以启动应用,页面上将显示加载了数据的 Kanban。
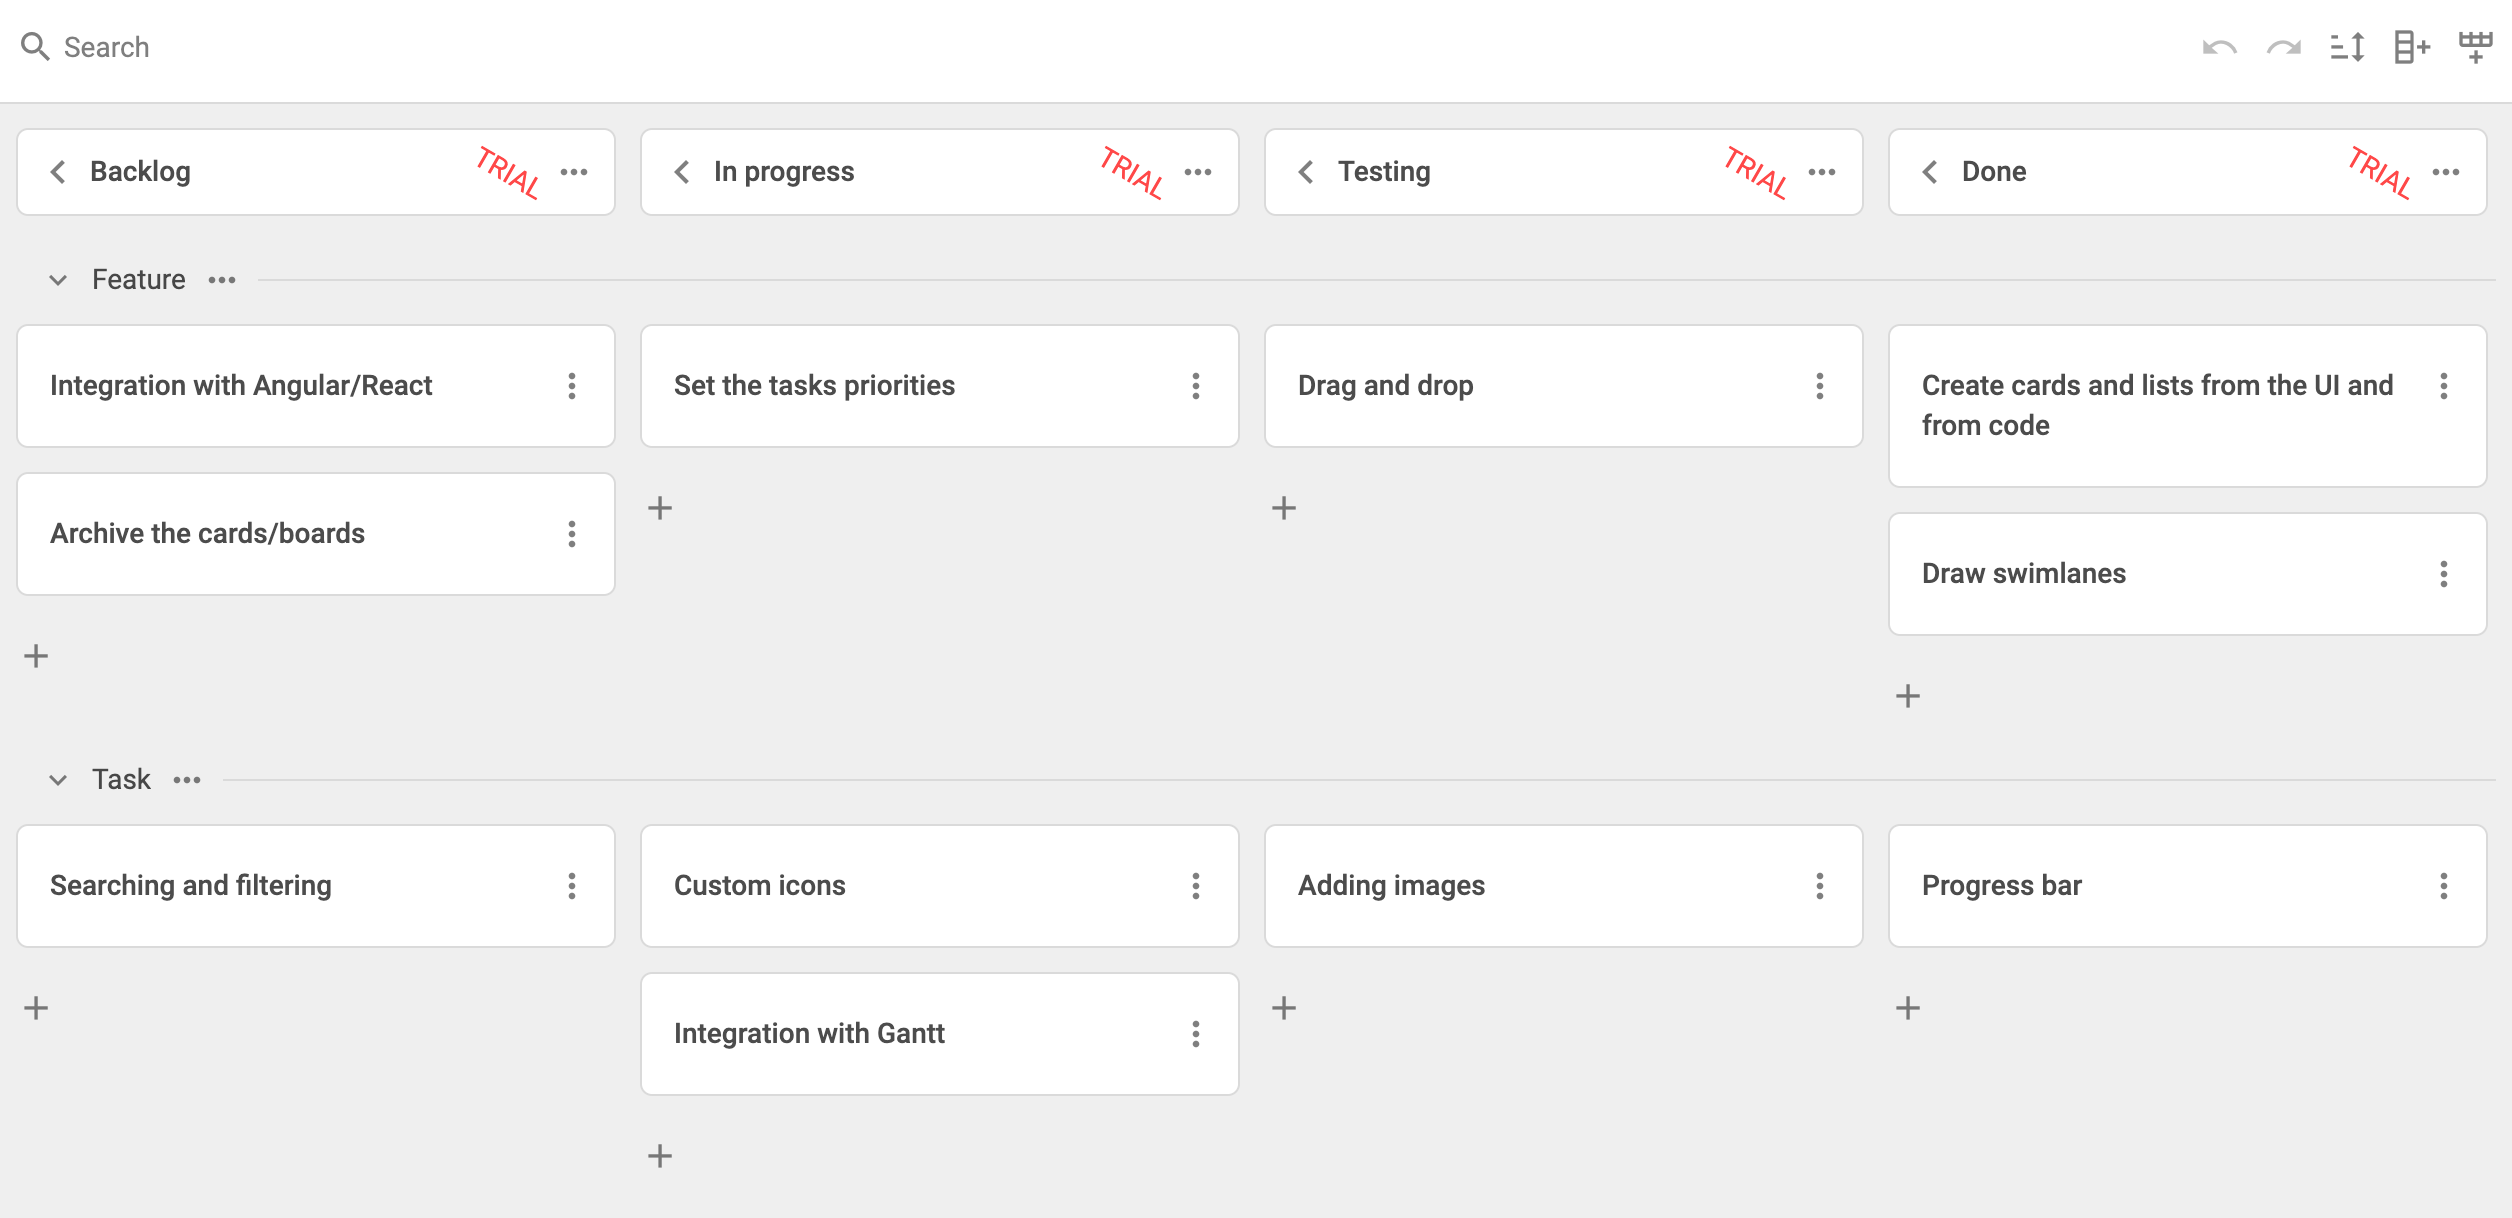
以上就是 DHTMLX Kanban 与 Angular 集成的基本步骤。您可根据需求调整代码。更多高级示例请参考 GitHub。