Integration with Angular
It's helpful to have a basic understanding of Angular before jumping in here. If you need a quick refresher, check out the Angular documentation.
DHTMLX Kanban works well with Angular. There are code samples available that show how to use DHTMLX Kanban in Angular projects. For more details, take a look at the Example on GitHub.
Creating a project
Make sure you have Angular CLI and Node.js installed before getting started.
To set up a new my-angular-kanban-app project, just use Angular CLI with this command:
ng new my-angular-kanban-app
If you want to follow along with this guide, remember to turn off Server-Side Rendering (SSR) and Static Site Generation (SSG/Prerendering) when setting up your Angular app!
This command will set up everything you need, so there’s no need to run any extra commands afterwards.
Installation of dependencies
Head into your new app’s directory:
cd my-angular-kanban-app
Next, install the dependencies and start up the dev server. The yarn package manager works well for this:
yarn
yarn start
Your app should now be running locally (for example, at http://localhost:3000).
Creating Kanban
To get started with DHTMLX Kanban, you’ll need the source code. First, stop your app and install the Kanban package.
Step 1. Package installation
Download the trial Kanban package and follow the instructions in the README file. Just a heads up: the trial version works for 30 days.
Step 2. Component creation
Next, set up an Angular component to include Kanban with a Toolbar in your app. Create a kanban folder inside src/app/, then add a new file called kanban.component.ts.
Import source files
Open up kanban.component.ts and import the Kanban source files. Here’s what to keep in mind:
- If you’re using the PRO version and installed Kanban from a local folder, your import will look like this:
import { Kanban, Toolbar } from 'dhx-kanban-package';
- If you’re using the trial version, the import should be:
import { Kanban, Toolbar } from '@dhx/trial-kanban';
This guide shows how to work with the trial version.
Set containers and initialize the Kanban with Toolbar
To get Kanban and the Toolbar on your page, set up containers and initialize these components using their constructors:
import { Kanban, Toolbar } from '@dhx/trial-kanban';
import { Component, ElementRef, OnInit, ViewChild, OnDestroy, ViewEncapsulation} from '@angular/core';

@Component({
    encapsulation: ViewEncapsulation.None,
    selector: "kanban", // a template name used in the "app.component.ts" file as <kanban />
    styleUrls: ["./kanban.component.css"], // include the css file
    template:  `<div class = "component_container">
                    <div #toolbar_container></div>
                    <div #kanban_container class = "widget"></div>
                </div>`
})

export class KanbanComponent implements OnInit, OnDestroy {
    // initialize container for Toolbar
    @ViewChild("toolbar_container", { static: true }) toolbar_container!: ElementRef;
    // initialize container for Kanban
    @ViewChild("kanban_container", { static: true }) kanban_container!: ElementRef;

    private _kanban!: Kanban;
    private _toolbar!: Toolbar;

    ngOnInit() {
        // initialize the Kanban component
        this._kanban = new Kanban(this.kanban_container.nativeElement, {});

        // initialize the Toolbar component
        this._toolbar = new Toolbar(this.toolbar_container.nativeElement, {
            api: this._kanban.api,
            // other configuration properties
        });
    }

    ngOnDestroy(): void {
        this._kanban.destructor(); // destruct Kanban
        this._toolbar.destructor(); // destruct Toolbar
    }
}
Adding styles
To make sure Kanban displays properly, add the right styles. You can create a kanban.component.css file in src/app/kanban/ and include these styles for Kanban and its container:
/* import Kanban styles */
@import "@dhx/trial-kanban/dist/kanban.css";

/* specify styles for initial page */
html,
body{
    height: 100%;
    padding: 0;
    margin: 0;
}

/* specify styles for Kanban and Toolbar container*/
.component_container {
    height: 100%;
    margin: 0 auto;
}

/* specify styles for Kanban container */
.widget {
    height: calc(100% - 56px);
}
Loading data
To fill Kanban with data, you’ll need a data set. Create a data.ts file in src/app/kanban/ and add some sample data like this:
export function getData() {
    const columns = [
        {
            label: "Backlog",
            id: "backlog"
        },
        {
            label: "In progress",
            id: "inprogress"
        },
        // ...
    ];

    const cards = [
        {
            id: 1,
            label: "Integration with Angular/React",
            priority: 1,
            color: "#65D3B3",
            start_date: new Date("01/07/2021"),
            users: [3, 2],
            column: "backlog",
            type: "feature",
        },
        {
            label: "Archive the cards/boards ",
            priority: 3,
            color: "#58C3FE",
            users: [4],
            progress: 1,
            column: "backlog",
            type: "feature",
        },
        // ...
    ];

    const rows = [
        {
            label: "Feature",
            id: "feature",
        },
        {
            label: "Task",
            id: "task",
        }
    ];

    return { columns, cards, rows };
}
Now, open kanban.component.ts. Import your data file and add the data properties to the Kanban configuration object inside ngOnInit() like this:
import { Kanban, Toolbar } from '@dhx/trial-kanban';
import { getData } from "./data"; // import data
import { Component, ElementRef, OnInit, ViewChild, OnDestroy, ViewEncapsulation} from '@angular/core';

@Component({
    encapsulation: ViewEncapsulation.None,
    selector: "kanban",
    styleUrls: ["./kanban.component.css"],
    template:  `<div class = "component_container">
                    <div #toolbar_container></div>
                    <div #kanban_container class = "widget"></div>
                </div>`
})

export class KanbanComponent implements OnInit, OnDestroy {
    @ViewChild("toolbar_container", { static: true }) toolbar_container!: ElementRef;
    @ViewChild("kanban_container", { static: true }) kanban_container!: ElementRef;

    private _kanban!: Kanban;
    private _toolbar!: Toolbar;

    ngOnInit() {
        const { cards, columns, rows } = getData(); // initialize data properties
        this._kanban = new Kanban(this.kanban_container.nativeElement, {
            columns, // apply column data
            cards, // apply card data
            rows, // apply row data
            rowKey: "type",
            // other configuration properties
        });

        this._toolbar = new Toolbar(this.toolbar_container.nativeElement, {
            api: this._kanban.api,
            // other configuration properties
        });
    }

    ngOnDestroy(): void {
        this._kanban.destructor();
        this._toolbar.destructor();
    }
}
You can also load data into Kanban using the setConfig() or parse() method inside the ngOnInit() method.
import { Kanban, Toolbar } from '@dhx/trial-kanban';
import { getData } from "./data"; // import data
import { Component, ElementRef, OnInit, ViewChild, OnDestroy, ViewEncapsulation} from '@angular/core';

@Component({
    encapsulation: ViewEncapsulation.None,
    selector: "kanban",
    styleUrls: ["./kanban.component.css"],
    template:  `<div class = "component_container">
                    <div #toolbar_container></div>
                    <div #kanban_container class = "widget"></div>
                </div>`
})

export class KanbanComponent implements OnInit, OnDestroy {
    @ViewChild("toolbar_container", { static: true }) toolbar_container!: ElementRef;
    @ViewChild("kanban_container", { static: true }) kanban_container!: ElementRef;

    private _kanban!: Kanban;
    private _toolbar!: Toolbar;

    ngOnInit() {
        const { cards, columns, rows } = getData(); // initialize data properties
        this._kanban = new Kanban(this.kanban_container.nativeElement, {
            columns: [],
            cards: [],
            rows: [],
            rowKey: "type",
            // other configuration properties
        });

        this._toolbar = new Toolbar(this.toolbar_container.nativeElement, {
            api: this._kanban.api,
            // other configuration properties
        });

        // apply the data via the parse() method
        this._kanban.setConfig({
            columns,
            cards,
            rows
        });
    }

    ngOnDestroy(): void {
        this._kanban.destructor();
        this._toolbar.destructor();
    }
}
The setConfig or parse() method lets you reload data whenever you need to update it.
At this point, the Kanban component is good to go. When you add the element to a page, Kanban will initialize with your data. You can also tweak the configuration as needed. For all available options, check out the Kanban API docs.
Handling events
Whenever someone interacts with Kanban, events get fired. You can use these events to react and run your own code. The full list of events is available in the docs.
To handle events, open kanban.component.ts and add the following to ngOnInit():
// ...
ngOnInit() {
    this._kanban = new Kanban(this.kanban_container.nativeElement, {});

    this._kanban.api.on("add-card", (obj) => {
        console.log(obj.columnId);
    });
}

ngOnDestroy(): void {
    this._kanban.destructor();
}
Step 3. Adding Kanban into the app
To use the KanbanComponent in your app, open src/app/app.component.ts and replace the default code with this:
import { Component } from "@angular/core";

@Component({
    selector: "app-root",
    template: `<kanban/>`
})
export class AppComponent {
    name = "";
}
Next, create app.module.ts in src/app/ and add KanbanComponent as shown here:
import { NgModule } from "@angular/core";
import { BrowserModule } from "@angular/platform-browser";

import { AppComponent } from "./app.component";
import { KanbanComponent } from "./kanban/kanban.component";

@NgModule({
    declarations: [AppComponent, KanbanComponent],
    imports: [BrowserModule],
    bootstrap: [AppComponent]
})
export class AppModule {}
Finally, open src/main.ts and update it like this:
import { platformBrowserDynamic } from "@angular/platform-browser-dynamic";
import { AppModule } from "./app/app.module";
platformBrowserDynamic()
    .bootstrapModule(AppModule)
    .catch((err) => console.error(err));
Now you can start the app and see Kanban loaded with your data.
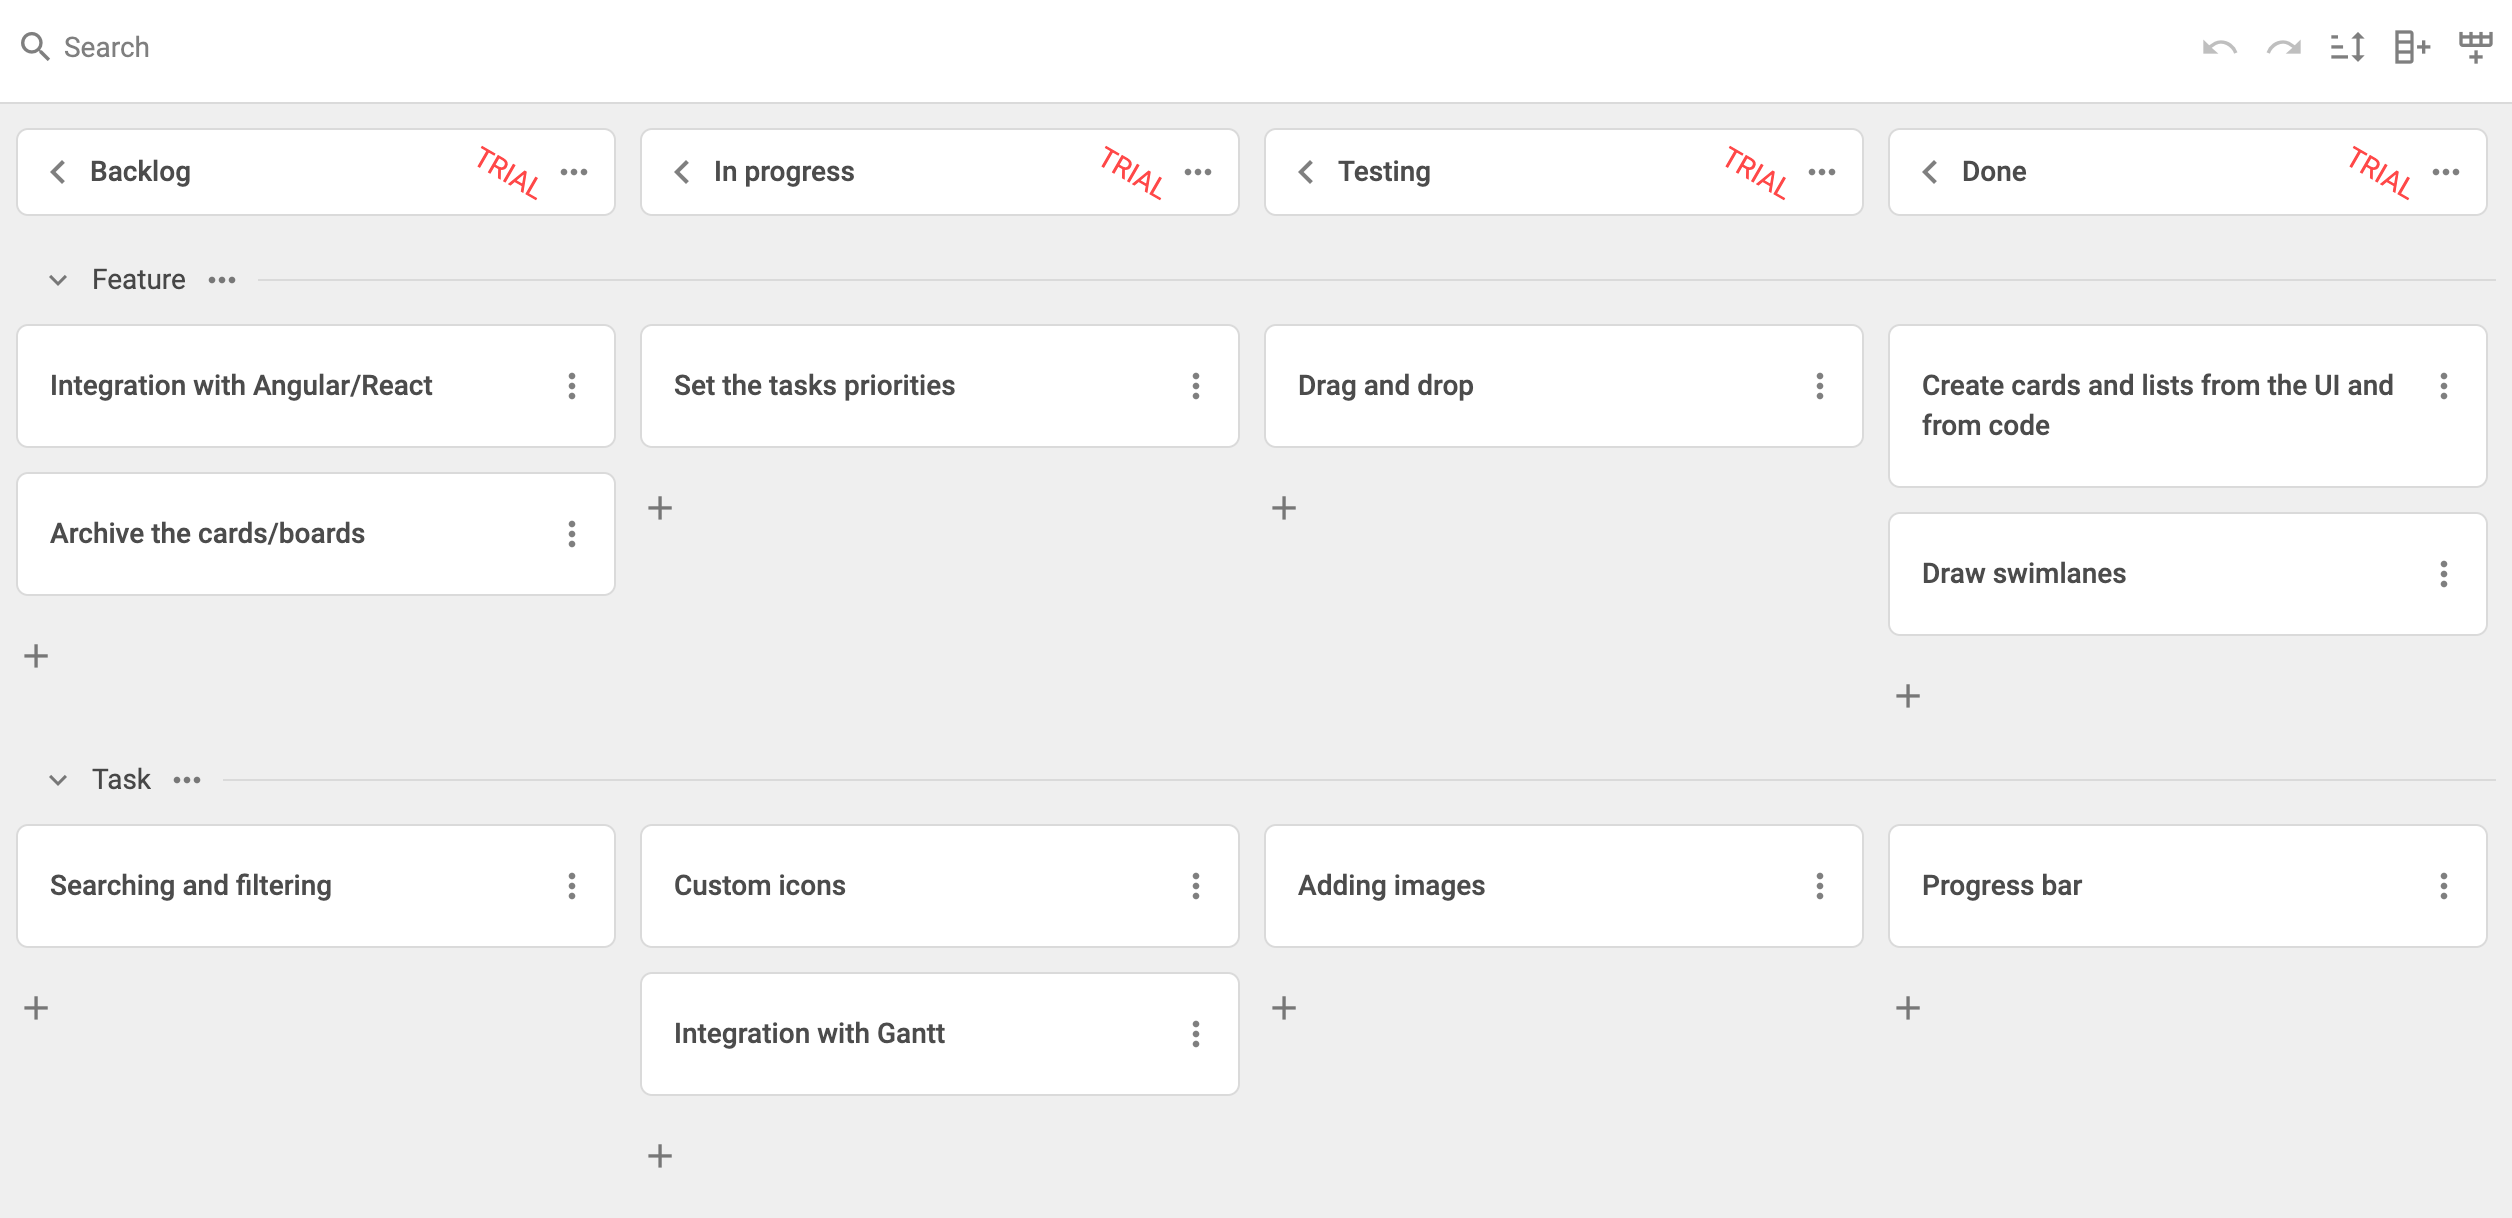
That’s it for integrating DHTMLX Kanban with Angular. Feel free to adjust the code to fit your project’s needs. There’s a more advanced example available on GitHub.